⚙️ Set Up Automatic Trigger
So KIWacht runs automatically every 5 minutes — no manual execution needed
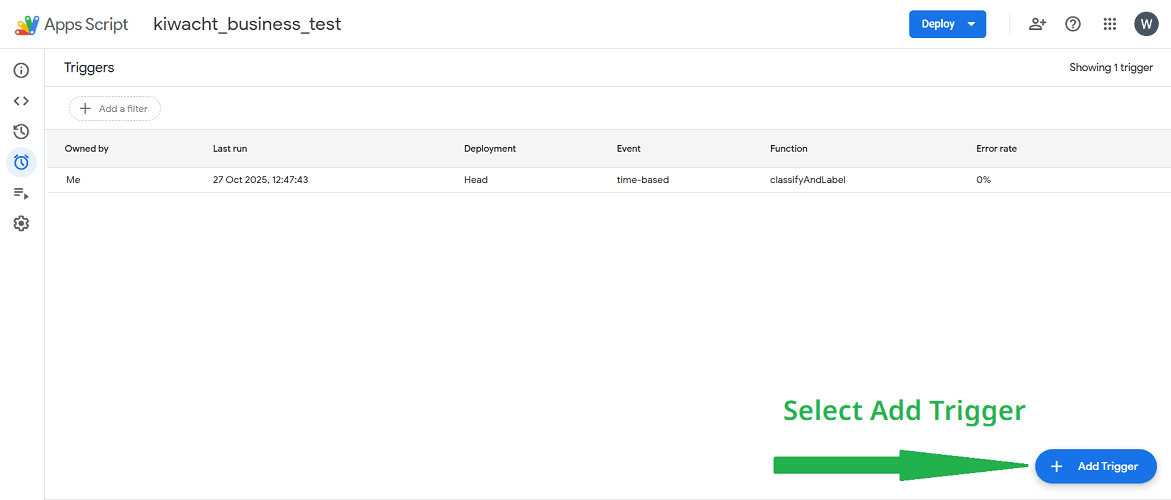
1. Click “Add Trigger”
In the left sidebar, click the Triggers icon, then click the blue “Add Trigger” button.
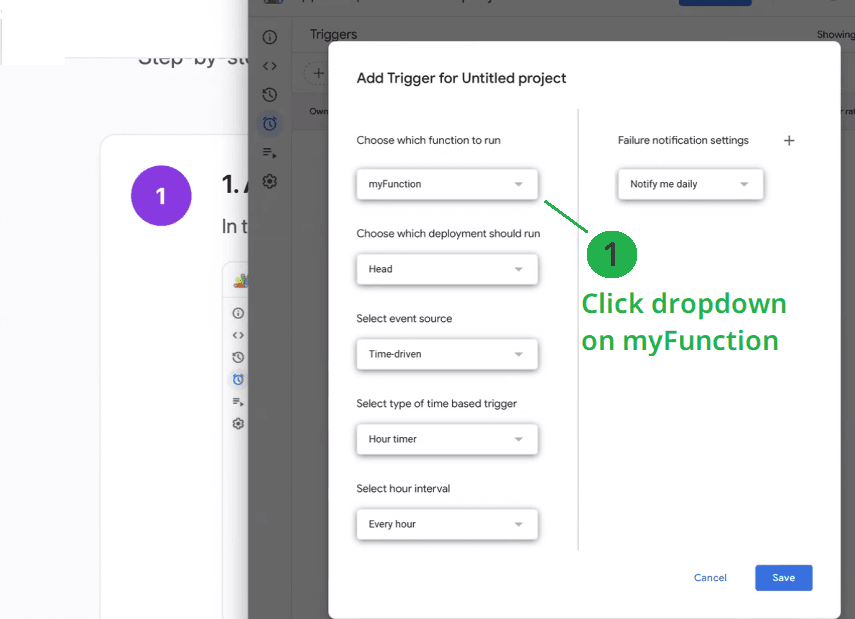
2. Choose function to run
Click the dropdown menu labeled “Select function to run”.
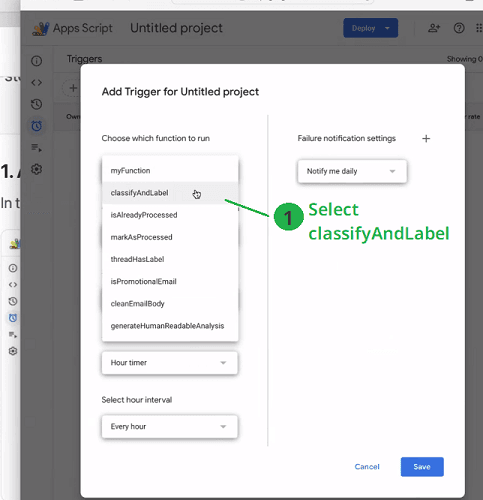
3. Select classifyAndLabel
From the list, choose the function classifyAndLabel.
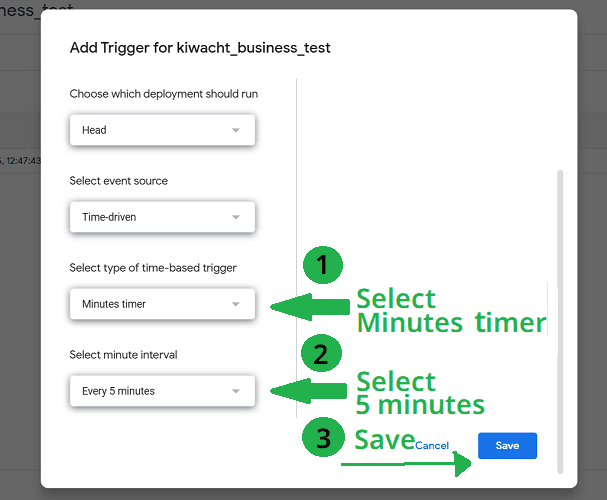
4. Configure time interval
Set up the trigger as follows:
- Arrow 1: Select “Minutes timer”
- Arrow 2: Choose “Every 5 minutes”
- Arrow 3: Click “Save”
⚠️ Without this step, the script will not run automatically!
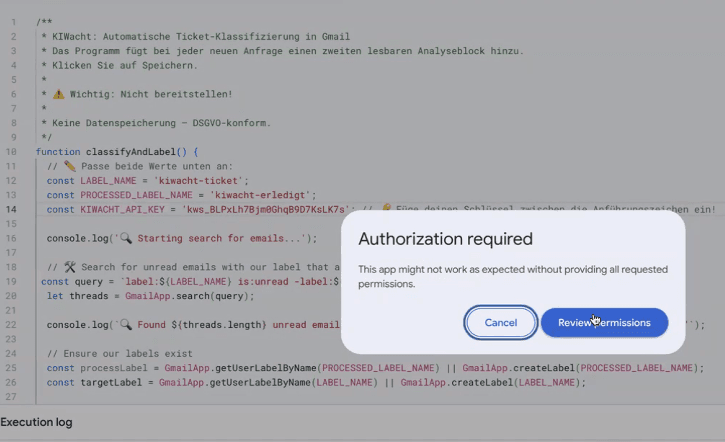
🔐Confirm permissions (one-time only)
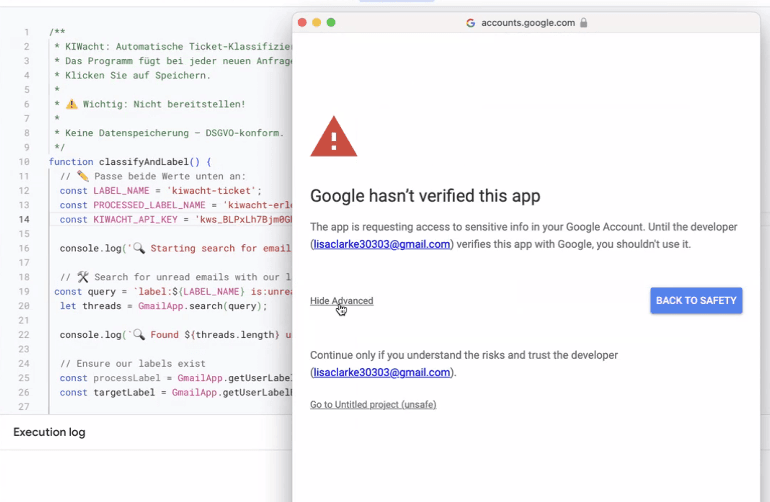
When you first save the trigger, Google shows a warning because the script isn’t verified. This is normal for all custom scripts — just follow these steps:
Click “Review permissions”.
Click the small “Advanced” link at the bottom.

Click “Go to KIWacht (unsafe)”. (If you renamed your project, it will say “KIWacht” instead of “untitled project”.)
Select **only** “Read email” — KIWacht doesn’t need any other permissions!
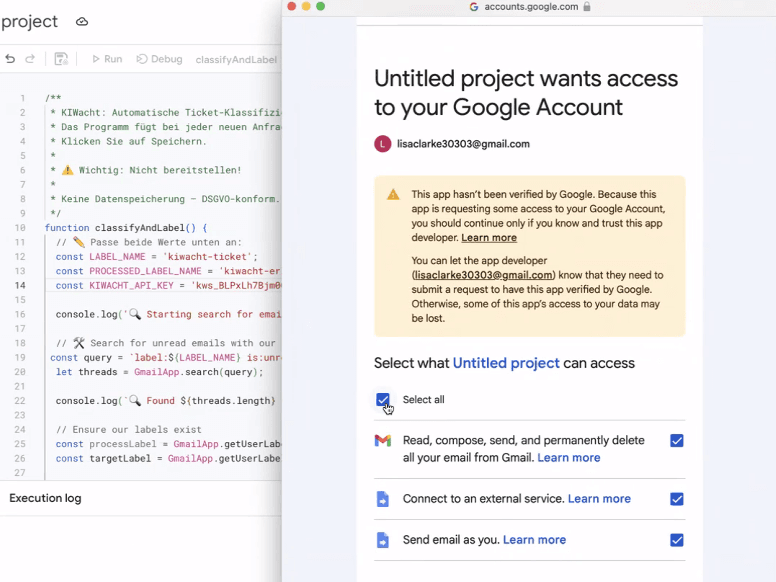
💡 Note: KIWacht only accesses emails with the kiwacht-ticket label — never your other messages.