← Back to Gmail Guide
🏷️ Visual Guide: Create Gmail Labels
Step-by-step with images — how to create the required labels in Gmail

Block 1
Create Labels in Gmail
1
Open your Gmail account and click on Labels
Open Gmail and click on 'Labels' in the sidebar

2
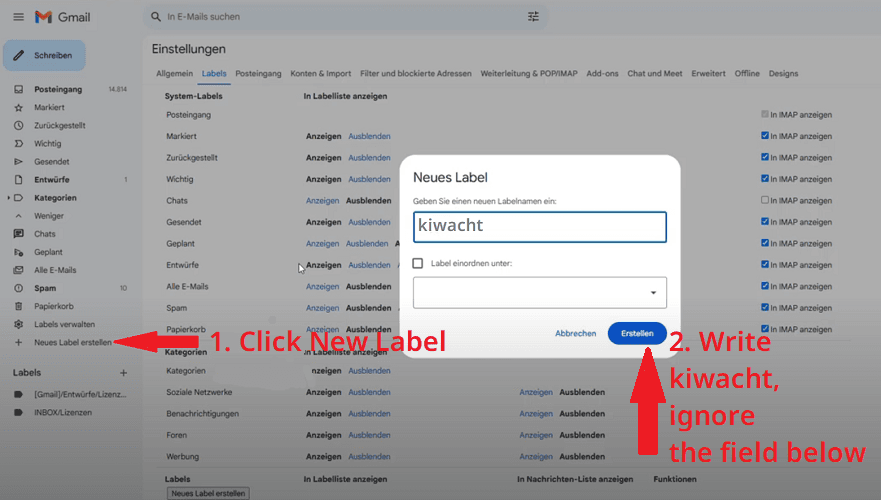
Create new label
Click 'Create new label' and give your label the name kiwacht, ignore the nest field below
3
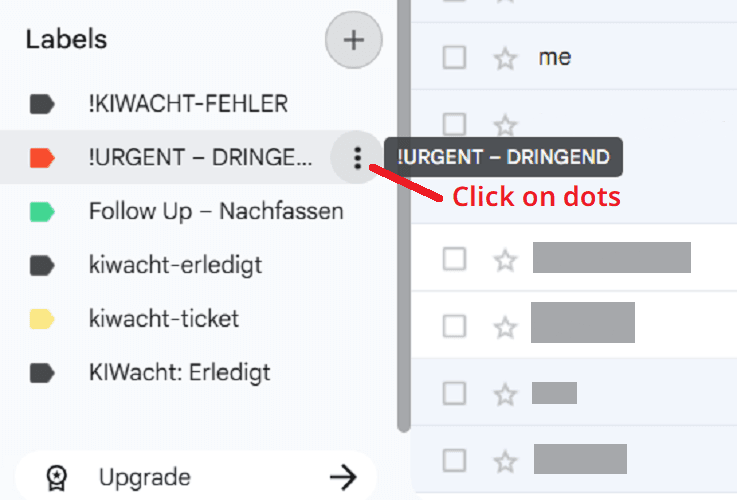
Click on three dots
Select the three little dots next to the newly created label to choose label colours
4
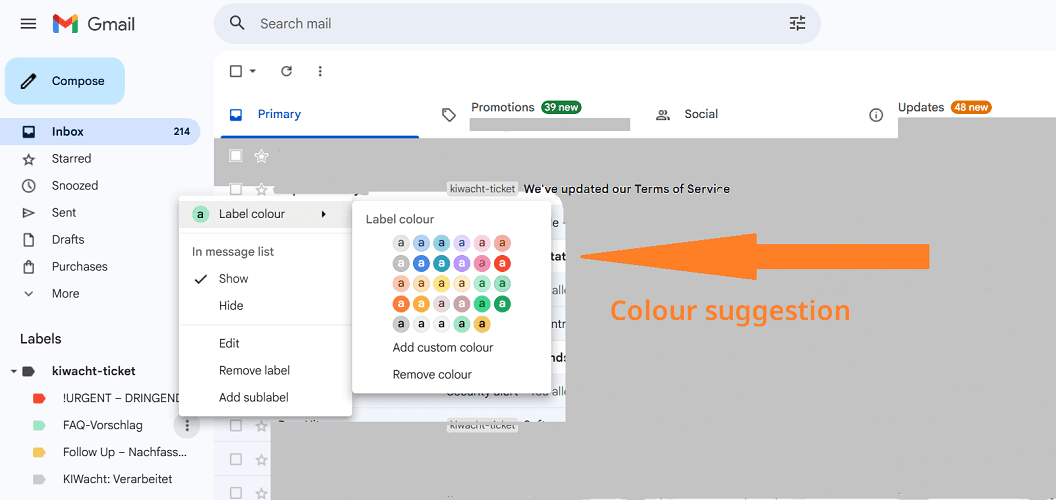
Enter label name
Enter the words 'kiwacht-ticket' and then click create
5
Create all required labels
Create **six** labels with **exactly these names** (mind spaces, en-dash `–`, and casing):

✅ Done!
You have successfully created all required labels:
kiwacht-ticket!URGENT – DRINGENDFAQ-VorschlagFollow Up – NachfassenSales – Vertriebkiwacht-erledigtℹ️ What do these labels mean?
- kiwacht-ticket – The trigger label. Apply this to emails you want Kiwacht to analyze.
- kiwacht-erledigt – The completed label. Automatically added after analysis to prevent reprocessing.
- !URGENT – DRINGEND – Applied automatically for high-priority or negative-sentiment requests.
- Follow Up – Nachfassen – For medium-priority requests (e.g., feature requests, consultations).
- FAQ-Vorschlag – Added when Kiwacht can suggest a relevant help article link.
- Sales – Vertrieb – Automatically applied for sales-related inquiries (e.g., contract renewal, demo request, upsell).
⚠️ Important: Label names must be copied exactly as shown – including spaces, en-dash (`–`), and capitalization.